THUMPER Demo
This demo showcases capabilities of micro-ROS integrated with 6LoWPAN radio communication. More specifically, it shows the remote control of an unmanned mobile platform. As a research platform the THUMPER robot was controlled remotely with a joystick.

The project was based on the 6WD Thumper solution, a light six wheel chassis of 420x300x130 mm size and 2.7 kg weight equipped with six motors, each of which mounted on an independent suspension.
The basis vehicle was extended by assembling the RoboClaw motor controller and the Olimex STM32-E407 board with the PmodRF2 IEEE 802.15.4 module for low-power wireless communication. To enable remote driving the USB joystick, attached to the second set of the Olimex STM32-E407 board with the PmodRF2 radio communication module, was used.
The developed solution gives the ability to control the vehicle in every direction The basic elements of the project solution are shown on the diagram below.
Operation diagram overview
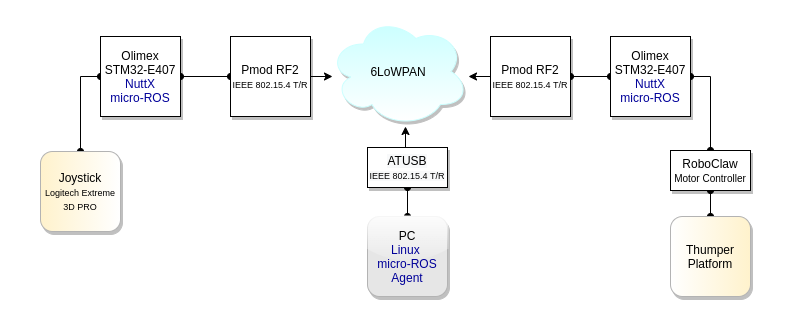
Both Olimex STM32-E407 boards are running NuttX and micro-ROS applications, which can exchange data via UDP over 6LoWPAN. The joystick’s position is converted into the velocity command and then posted on a micro-ROS stack as a message sequence. On the robot’s side, the micro-ROS Olimex application subscribes these messages, and convert these messages into motor commands. The micro-ROS agent enables data transmission between the micro-ROS publisher and subscriber clients. It is an additional linux PC, with ATUSB IEEE 802.15.4 USB adapter as a 6LoWPAN device, involved in this activity.
Topics
There are two micro-ROS nodes, the joystick’s publisher and the robot’s subscriber, which work on the topic /velocity_cmd - the velocity for driving a RoboClaw motor controller.
Thumper Demo Hardware
The following is a list of the demo hardware:
- 1 x Wild Thumper 6WD Chassis,
- 1 x RoboClaw 2x15A (V5E),
- 2 x Olimex STM32-E407,
- 2 x Digilent PmodRF2
- 1 x Logitech Extreme 3D PRO Joystick + Power Supply,
- 1 x PC,
- 1 x ATUSB IEEE 802.15.4 USB Adapter,
- 1 x ST-LINK/V2 to flash firmware to Olimex boards.
Thumper
All-Terrain Robot Chassis (Product Link)
- 6-wheel-drive
- independent suspension for each wheel
- 120mm-diameter wheels

Source: pololu.com
RoboClaw
2x15A Motor Controller (Product Link)
- Position Control
- USB, Serial, R/C, Analog Inputs
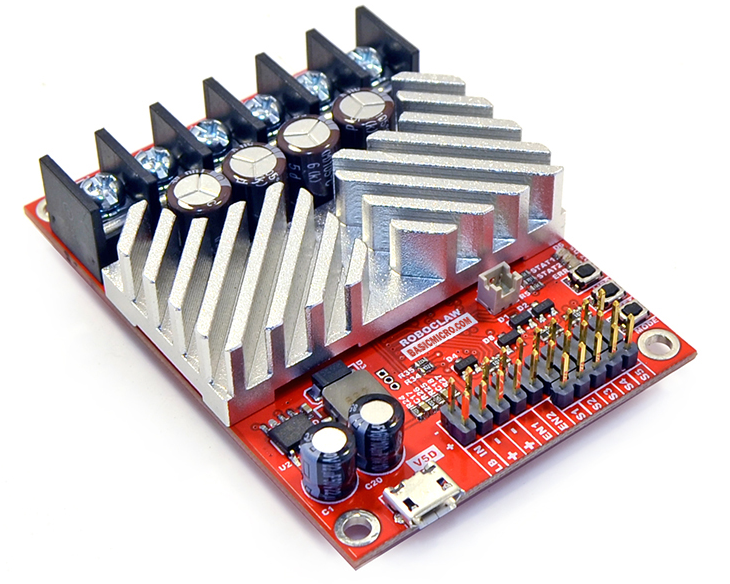
Source: basicmicro.com
Olimex STM32-E407
Development board for STM32F407ZGT6 microcontroller (Product Link)
- Ethernet
- USB
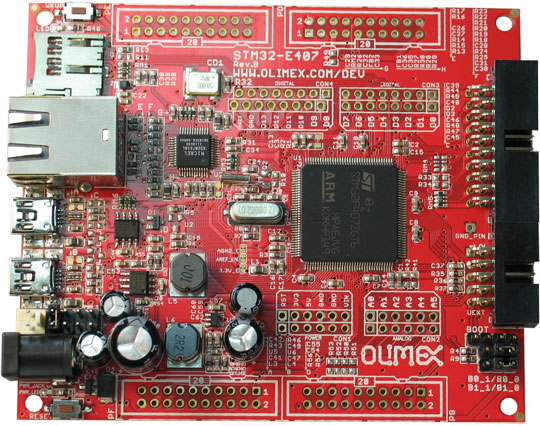
Source: olimex.com
Pmod RF2
IEEE 802.15 RF transceiver module (Product Link)
- supports ZigBee, MiWi and MiWi P2P
- 12-pin connector with SPI interface
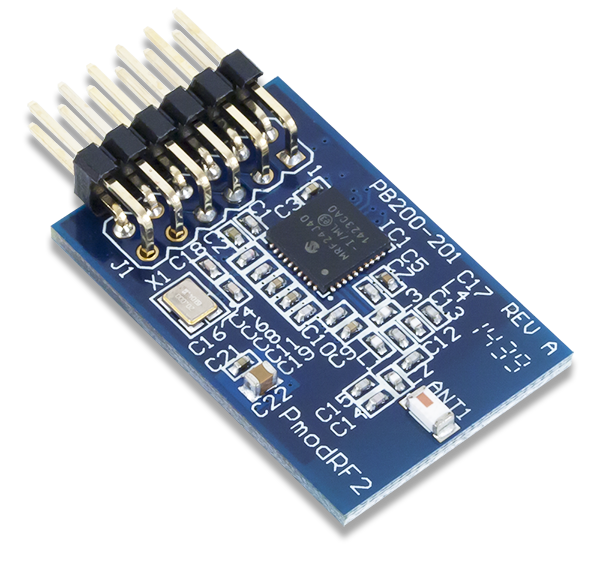
Source: digilentinc.com
Extreme 3D Pro Joystick
- 12 buttons
Thumper demo wiring
Below you can find how the hardware components should be connected.
| PmodRF2 | Olimex STM32-E407 |
|---|---|
| VCC/12 | 3V3 |
| GND/11 | GND |
| INT/7 | D8 |
| RST/8 | D9 |
| CS/1 | D10 |
| MOSI/2 | D11 |
| MISO/3 | D12 |
| SCLK/4 | D13 |
| RoboClaw | Olimex STM32-E407 |
|---|---|
| S1 | USART6_TX (UEXT/3) |
| GND | GND (UEXT/2) |
| Logitech Extreme 3D PRO | Olimex STM32-E407 |
|---|---|
| Joystick USB1 | USB_OTG2 |
1) connected to the external 5 VDC power supply
Application building
Building the Thumper demo’s firmware for the Olimex STM32-E407 platform
Use the Docker installation on PC to prepare the environment for the demo applications:
- Download the micro-ROS base Foxy image from the Docker Hub, then run a docker container.
sudo docker pull microros/base:foxy
sudo docker run -it --net=host --privileged -v /dev/bus/usb:/dev/bus/usb     microros/base:foxy
- Create a ROS 2 workspace in the
uros_wsfolder of the docker container and build the package.
source /opt/ros/$ROS_DISTRO/setup.bash
git clone -b $ROS_DISTRO https://github.com/micro-ROS/micro_ros_setup.git src/micro_ros_setup
apt update && rosdep update
rosdep install --from-path src --ignore-src -y
apt-get install python3-pip
apt-get -y install python3-pip
colcon build
source install/local_setup.bas
- Create the Nuttx firmware on Olimex STM32-E407 with the Thumper demo applications.
ros2 run micro_ros_setup create_firmware_ws.sh nuttx olimex-stm32-e407
cd firmware/NuttX
git checkout -t origin/ucs_demo_f
cd ../apps
git checkout -t origin/ucs_demo_f
cd ..
Build and flash the firmware.
- Set the config profile variable to select the joystick publisher or vehicle subcriber application.
CFG_PROFILE=uct_jspublisher_romfs
or
CFG_PROFILE=uct_jspublisher_romfs
- Build the application.
ros2 run micro_ros_setup configure_firmware.sh $CFG_PROFILE
cp firmware/NuttX/configs/olimex-stm32-e407/$CFG_PROFILE/rcS.template firmware/apps/nshlib/rcS.template
cd firmware/apps/nshlib/
../../NuttX/tools/mkromfsimg.sh -nofat ../../NuttX/
cd /uros_ws/
ros2 run micro_ros_setup build_firmware.sh
ros2 run micro_ros_setup flash_firmware.sh
- Connect ST-Link/V2 to the Olimex STM32-E407 JTAG interface and flash the firmware:
ros2 run micro_ros_setup flash_firmware.sh
In case of the joystick part use uct_jspublisher_romfs as the configuration profile, for the Thumper’s Olimex board use the uct_jssubscriber_romfs file.
Running the micro-ROS agent over 6LoWPAN on the Thumper demo
- Install wpan-tools on the PC.
sudo apt-get update -y
sudo apt-get install -y wpan-tools
Having the ATUSB adapter inserted into a USB port on PC, run the script wpan_atusb.sh with administrator privileges to configure the 6lowpan interface.
Then, the lowpan0 interface is ready to be used, so the communication with the joystick and Thumper 6LoWPAN devices can be established.
- Download the micro-ROS agent Foxy image from the Docker Hub, then run the agent in udp IPv6 addressing mode.
docker pull microros/micro-ros-agent:foxy
docker run -it --net=host microros/micro-ros-agent:foxy udp6 --port 9999 -v6
The agent is ready to work with micro-ROS clients over 6LoWPAN.
Running the demo
- Power ON the joystick equipment.
- Power ON the Thumper platform.
- Insert the ATUSB adapter into a USB port on PC and run the micro-ROS agent as described in the previous section.
After a while, the micro-ROS publisher and subscriber will establish a connection with the agent and the vehicle can then be remotely driven with the joystick. To let the vehicle run forward / backward or change its speed, push the stick along X axis, to move leftward / rightward rotate the handle around Z axis.